How to Clear Cache and Cookies on a Mac (9.73 GB Gone!)
It’s no secret that you can free up a lot of space on a Mac® hard drive simply by clearing the cache.
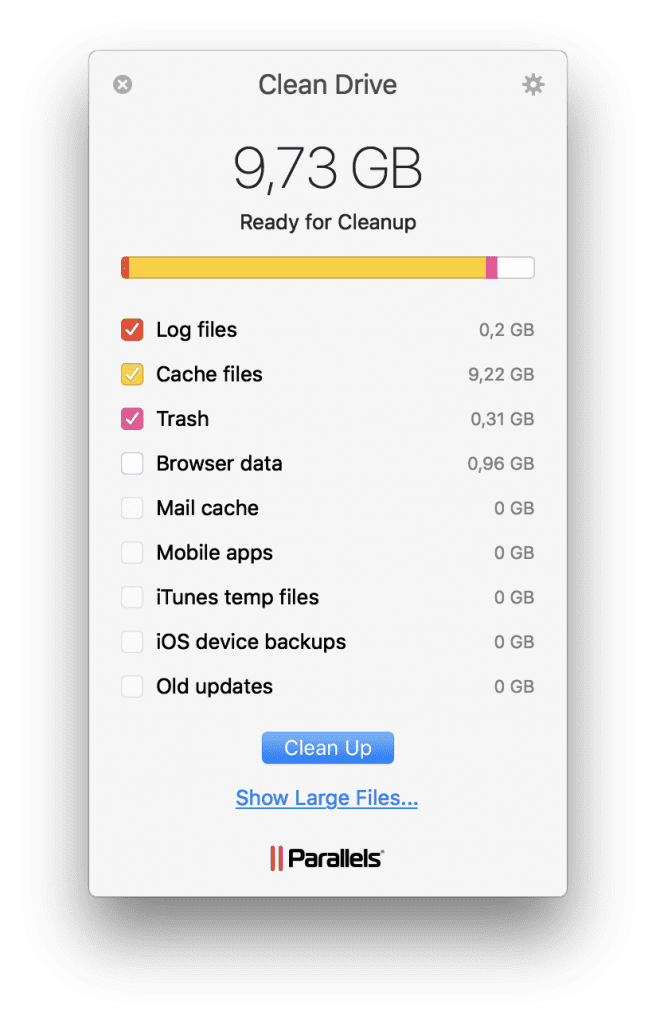
In fact, I managed to clear an enormous 9.73 GB of cache and cookies on my Mac just before I wrote this post.
The best part? You don’t have to be a computer guru to do the same. All it really takes is a few clicks to drastically optimize the hard drive.
It’s worth your time to dig a little bit deeper into why and when we need the cache—and when it’s time to get rid of it.
In this post, we’ll tell exactly what you need to know about this technology and provide a step-by-step guide on how to clear cache.
To get started, I want to show you how cache actually works, and why you should start optimizing it immediately.
What Is Cache and Why Do We Need It?
Simply speaking, cache is a collection of data that duplicates the original information you processed on your computer. Whenever you use any application, your Mac will store some sort of data in order to (potentially) request it faster in the future. As an example, these could be temporary files (such as images and HTML documents) created by a web browser or instant messenger (including Facebook, Twitter, Instagram and Skype).
If a user edits a lot of photos and videos, he may notice that the editor also saves temporary data on the hard disk. Video editors with the function of displaying applied effects during editing don’t always delete such files at the end of work—and the hard drive starts to explode in size.
Besides the obvious desire to clean up disk space, there may be other reasons for deleting caches, including:
- Correcting problems with webpages that load obsolete data.
- Deleting personal data stored on websites and applications.
- Forcing the deletion of obsolete cached information in the application.
If you need to clear all cache files with just one click, download a free trial of Parallels® Toolbox Disk and System Pack. The software will evaluate your log files, cache, trash, browser data, mail cache, mobile apps, and updates—and instantly delete them per your request.
If you want to do that manually, follow the steps below.
How to Clear System Cache in macOS
Step 1: Terminate all running applications using the Cmd+Q key combination.
Step 2: Open a Finder window and use Shift+Cmd+G to navigate to the directory
~/Library/Caches.

Step 3: Manually open every folder, select all the files using Cmd+A, and move everything to the Trash. If required, enter your password.
Note: It’s not advisable to delete cache folders. Keep them to avoid any system conflicts and only delete the files inside.
Step 4: Once again, using the Shift+Cmd+G key combination, now go to the folder
/Library/Caches.
Step 5: Do the same thing—manually delete all files inside each folder there.
Step 6: Reboot. The first time the system boots may take a little longer than usual. This is normal.
If there are multiples user accounts in the system, you have to repeat the same steps for each of them.
How to Clear Cache in Safari
By default, Safari doesn’t provide the functionality to clear cache. But we found a workaround.
In order to open a hidden feature, you have to pretend to be a developer. And voila! It works like magic.
Step 1: From the browser menu, select Safari -> Preferences -> Advanced.
Step 2: Enable the “Show Develop menu in menu bar” option and close the preferences window.
Step 3: From the browser menu, select Develop -> Empty caches.
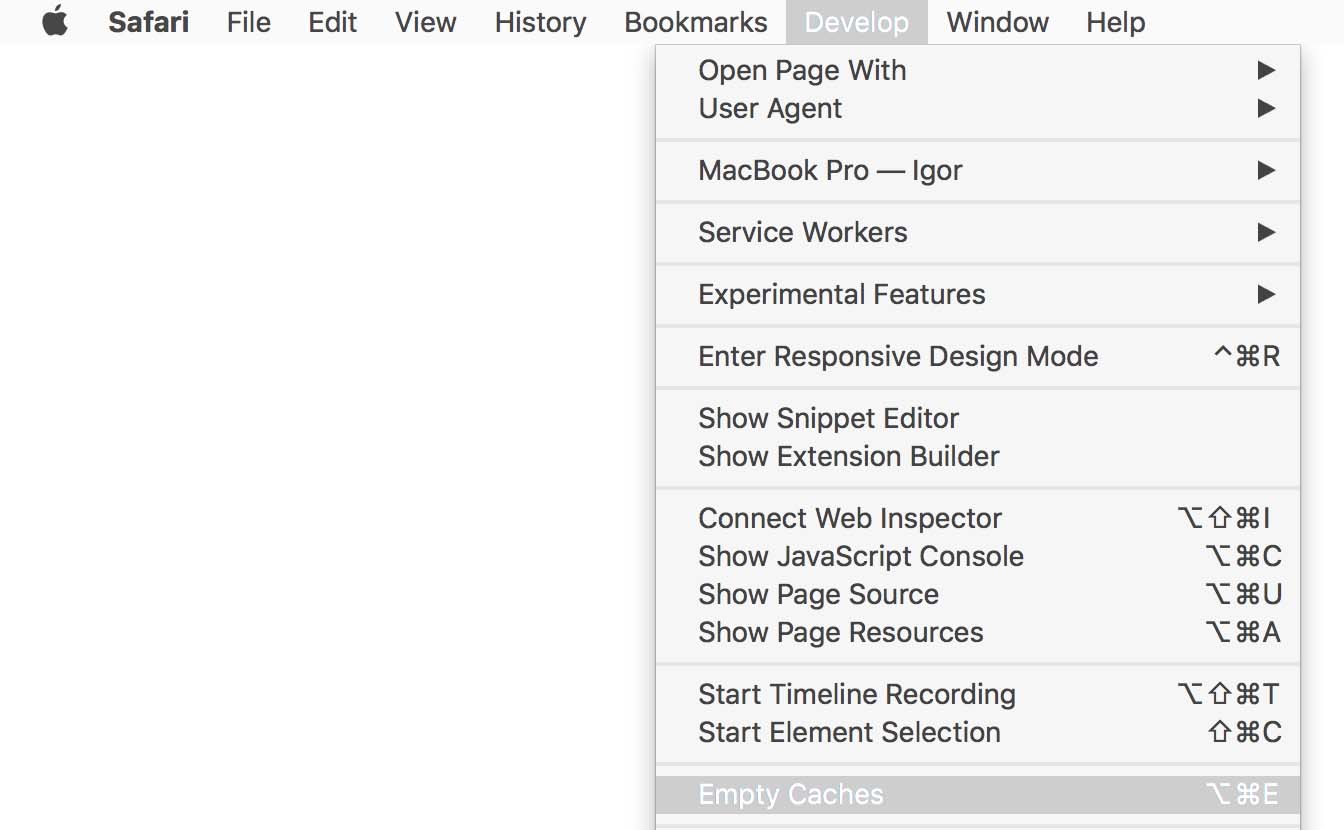
Step 4: All the caches are successfully cleared. Unfortunately, there isn’t any added functionality to choose what exactly to delete, but your browsing history will remain untouched.
Now you can refresh your Safari browser using Command+R shortcut.
How to Clear Cache in Google Chrome
To delete all the cached images and files in Chrome, navigate to “Clear browsing data” in Settings and clear the data.
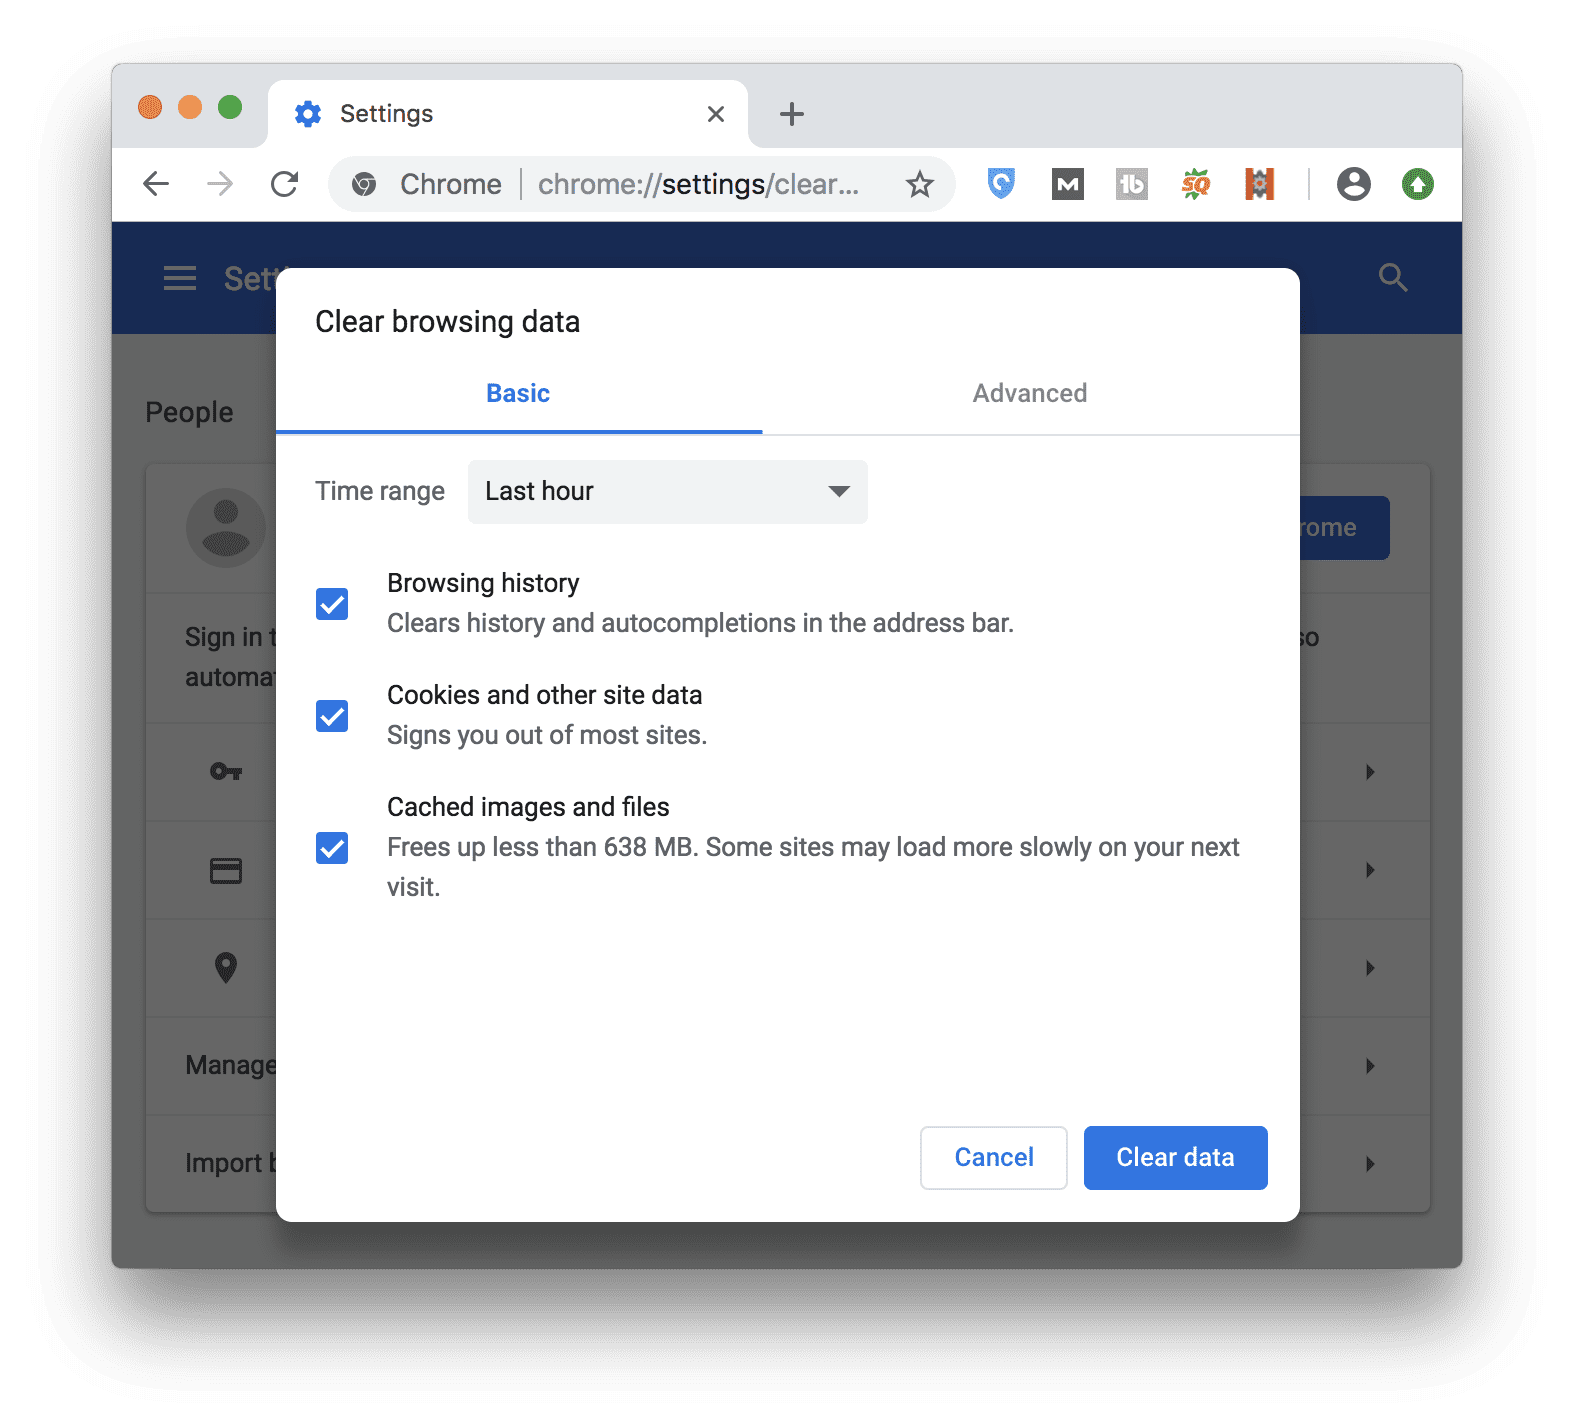
Step 1: In the Chrome window, click Chrome -> Clear Browsing data in the top left corner.
Hint: Alternatively, use a default Chrome shortcut, Command+Shift+Delete.
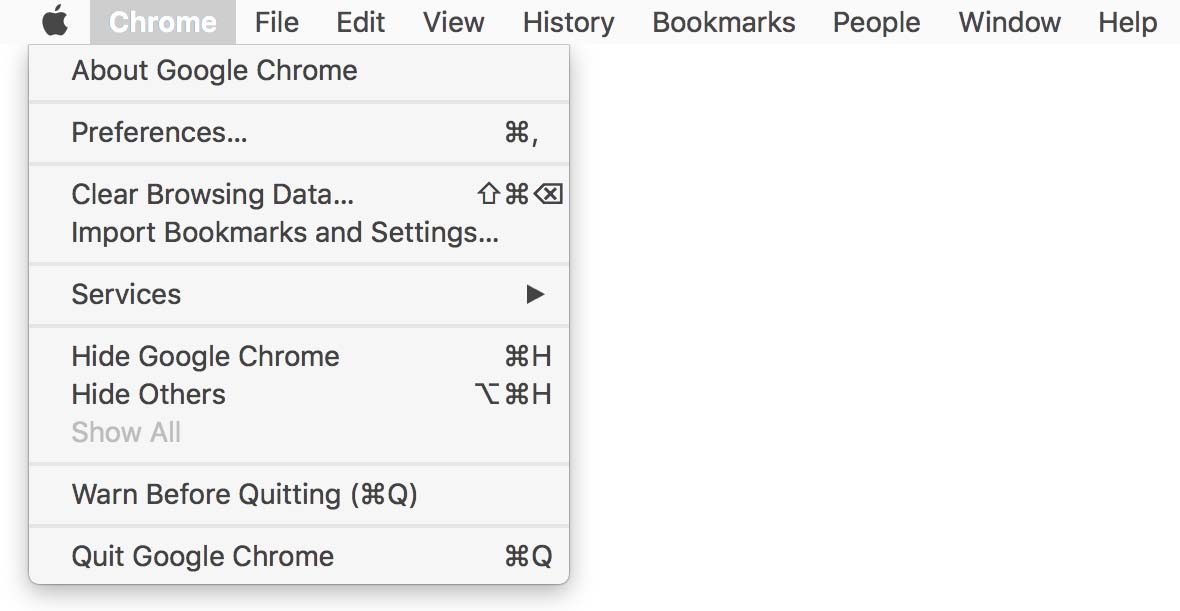
Step 2: In the “Clear browsing data” window, select the “Cached images and files” option. Choose the time range, depending on how much cache you want to eliminate.
Step 3” Click the “Clear data” button to free up the space.
How to Clear Cache in Mozilla Firefox
Clearing the cache in the latest Firefox versions is a relatively easy task. Everything is done within one small window.
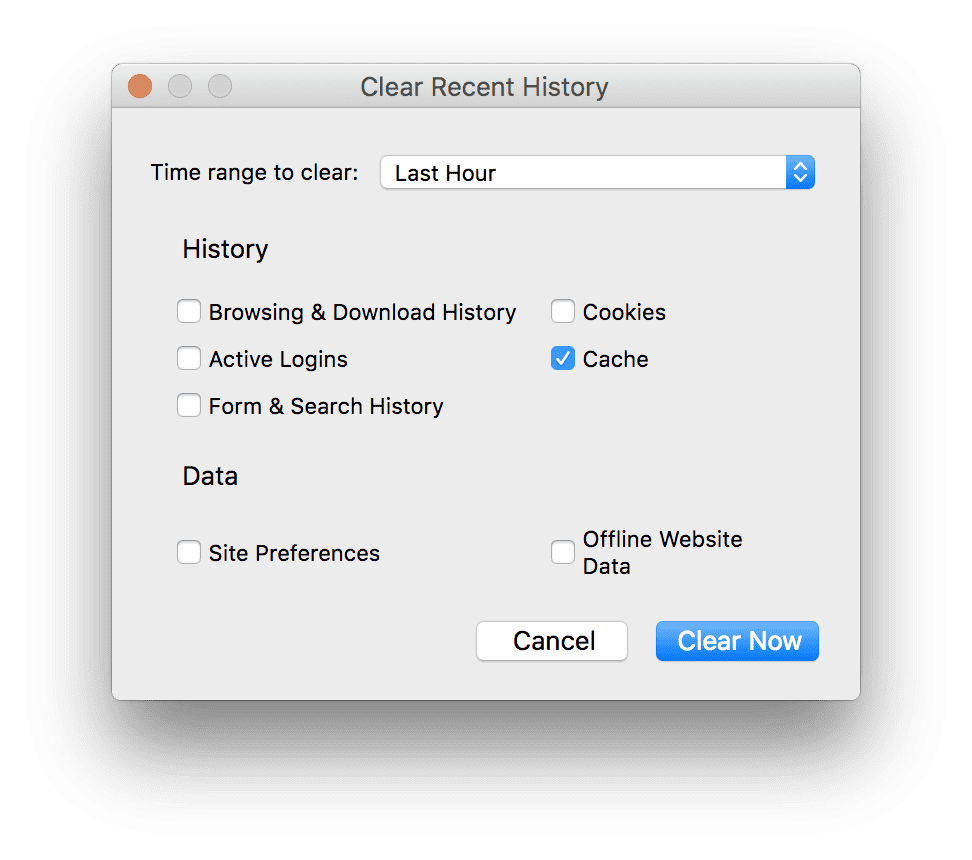
Step 1: From the Firefox window main menu, open History > Clear Recent History.
Step 2: Select only “Cache” and the preferred time range to clear the data.
Step 3: Click “Clear Now” to free up space.
There are advanced settings and add-ons that allow you to clear the cache in Firefox automatically every time when Firefox closes, but that may slow down your experience.
Applications Can Do Everything for You
You can, of course, spend time deleting caches manually, but why waste so much energy if there are applications that do it for you?
Parallels Toolbox is a powerful program that allows you to clear the cache in one click. This tool will remove caches and find other junk files on macOS, such as outdated backups and large files.
Let’s break down the benefits of Parallels Toolbox:
- Add any of the 30+ tools right in the tray menu for easy access.
![]()
- It’s fast.
I’ve already mentioned all the time the right tool will save you from the manual tasks. But on top of that, Parallels Toolbox is one of the fastest and most reliable software currently presented in its market niche.
- Get automatic notifications.

4. Delete large files.
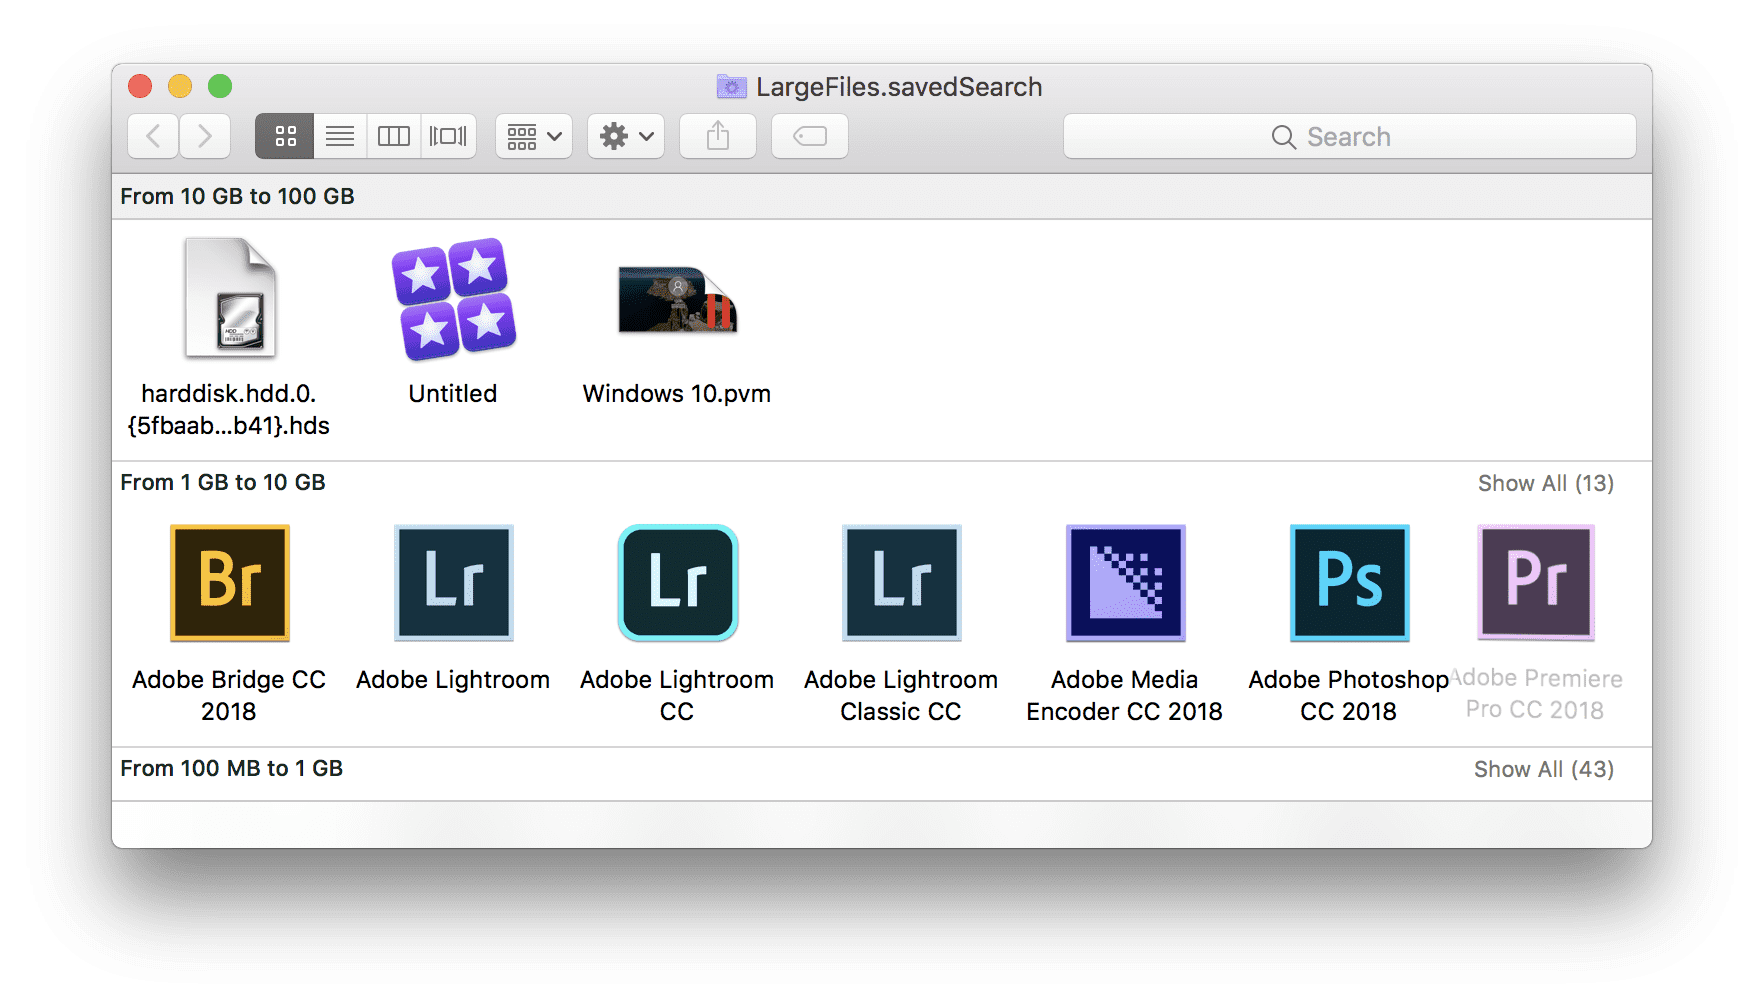
The Clean Drive tool allows you to find and delete large applications and files that you may not be aware of.
- Free up unused RAM memory—plus 30+ other perfectly designed tools.
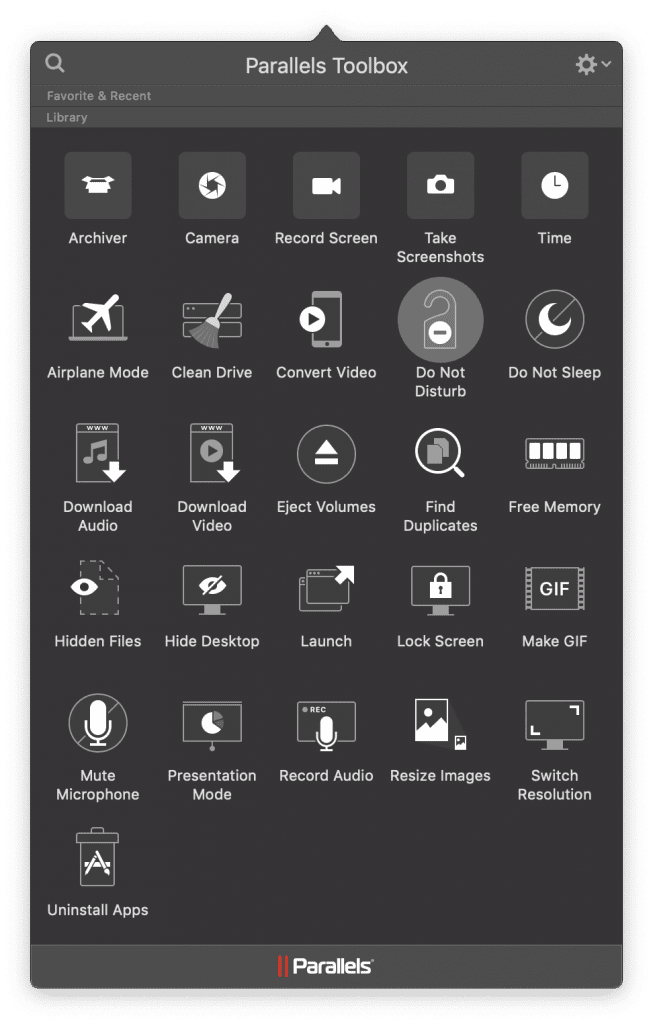
With Parallels Toolbox you can download your favorite online clips from Youtube and Facebook, make a gif, record a video of your screen, enjoy productivity apps and so much more!
