How to Transfer an Existing Virtual Machine to Your New Mac
Guest blog by Manoj Raghu, Parallels Support Team
We’ve all been there. (Or we all hope we’ll be there!) You just opened a shiny new Mac with pristine Mac OS X and blank settings. Yes, Apple has its own migration assistant, but according to my experience, many customers prefer to start fresh. Wait—does that mean you’ll have to build your Parallels Desktop virtual machine again from, scratch too?
The good news is that you can easily move your VM to your new Mac—you won’t have to rebuild your Parallels Desktop VM from scratch. The better news is that you can even import your Boot Camp installation into a VM and move it to the new Mac.
By default, your VM is a single .pvm bundle located in Documents → Parallels folder by default. If you can’t find it there, search for it using Spotlight.
We do recommend shutting down Windows before following the instructions below.
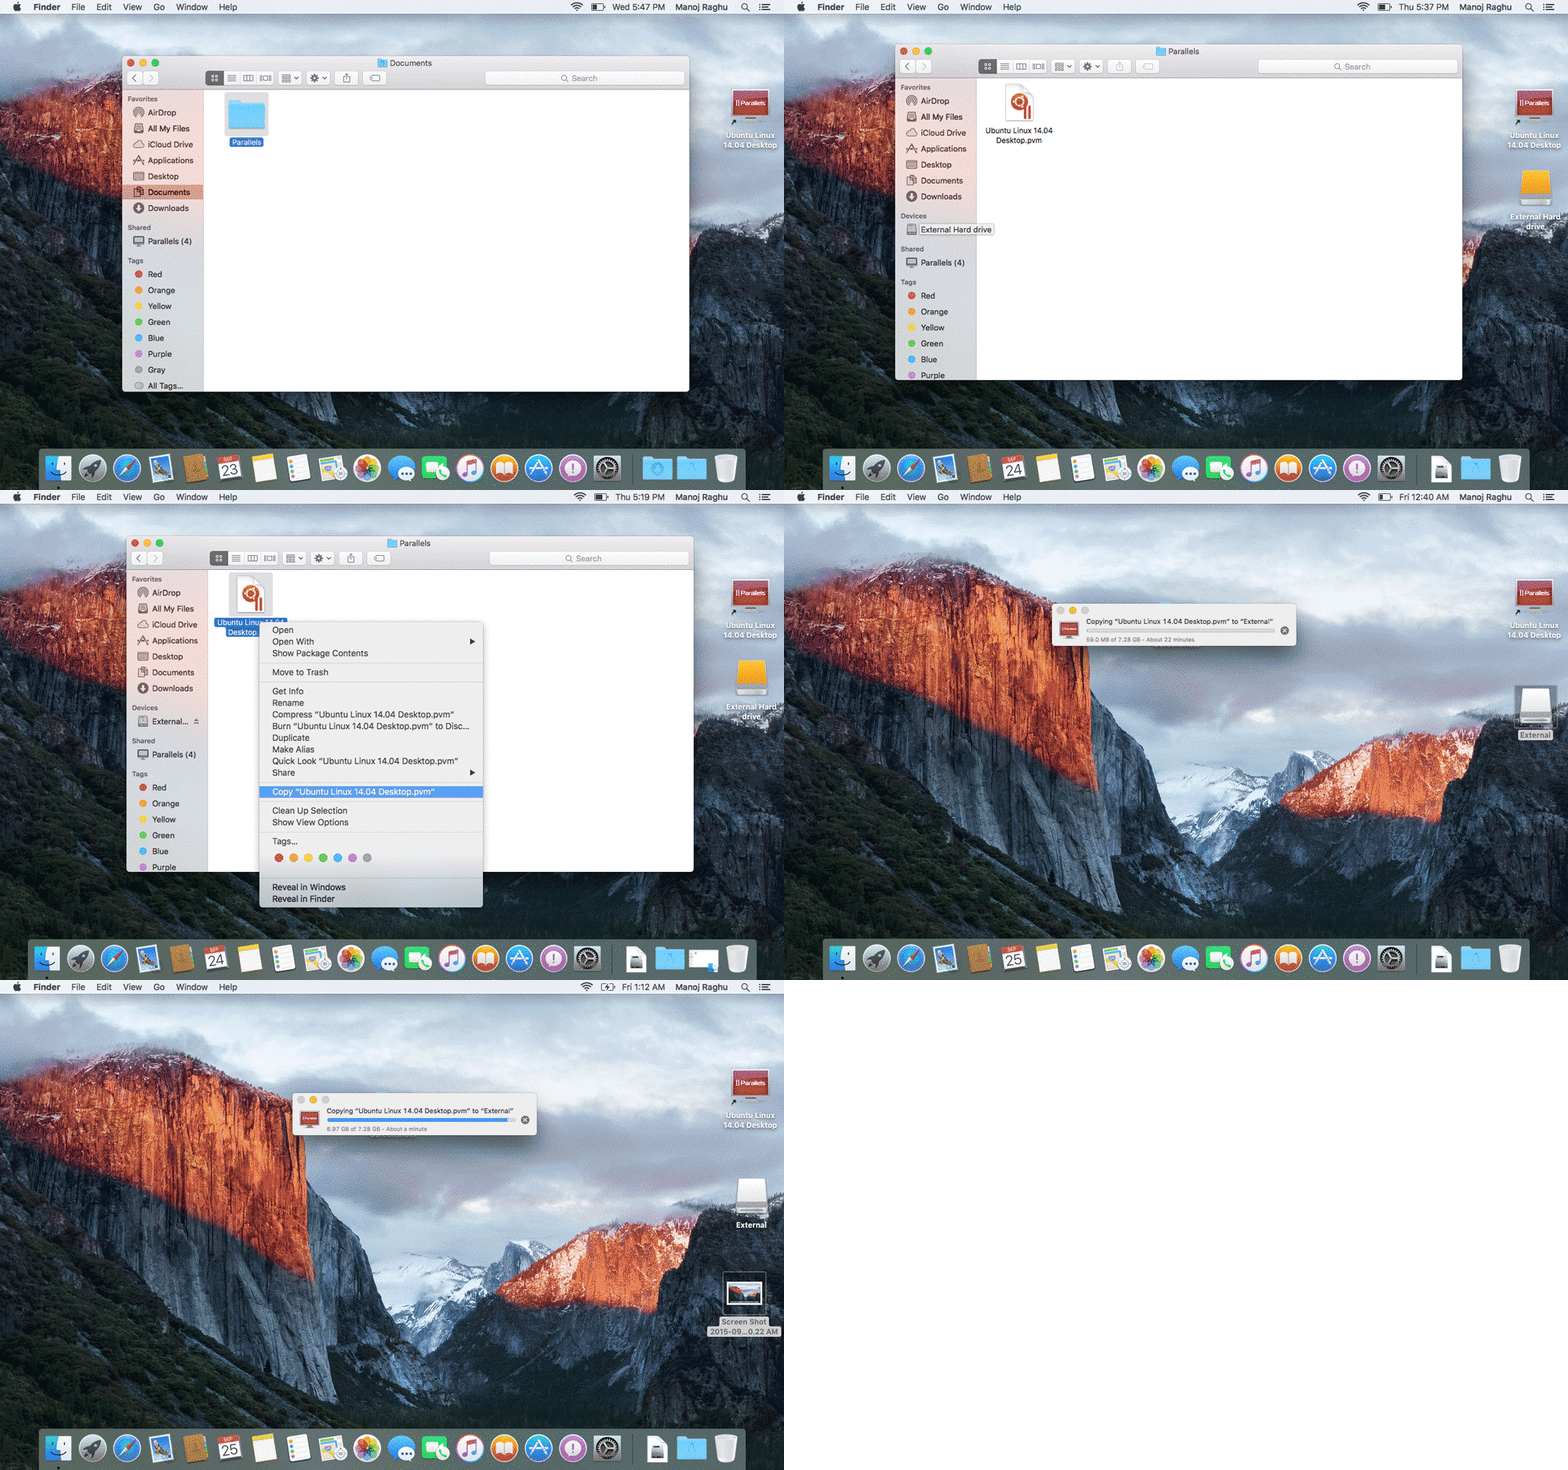
First, let me walk you through how to transfer your existing VM using an external hard drive.
How to Transfer Existing VM Using External Hard Drive
- Locate the VM on your old Mac hard drive (the .pvm bundle I mentioned above).
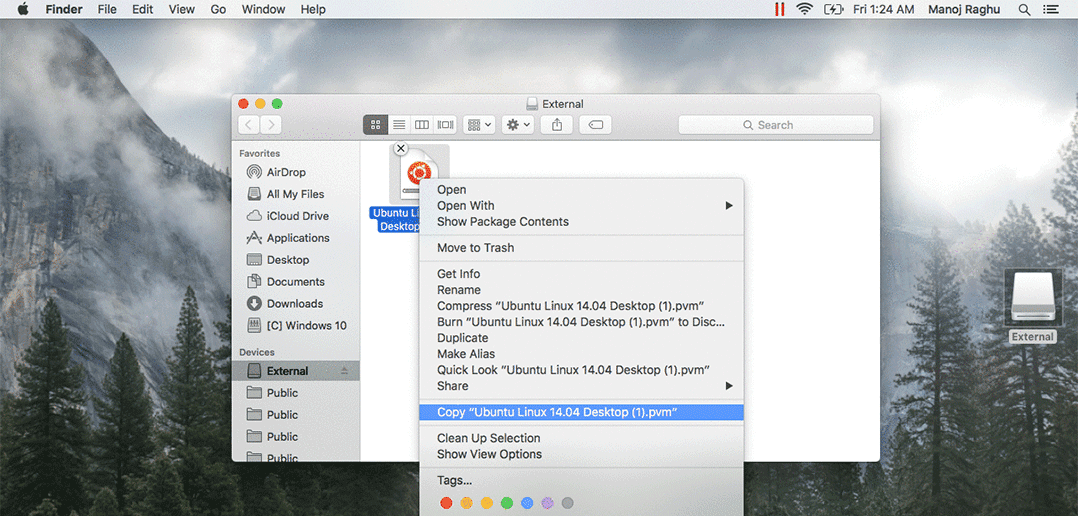
- Copy the .pvm file to your external hard drive.
- Connect your external hard drive to the new Mac.
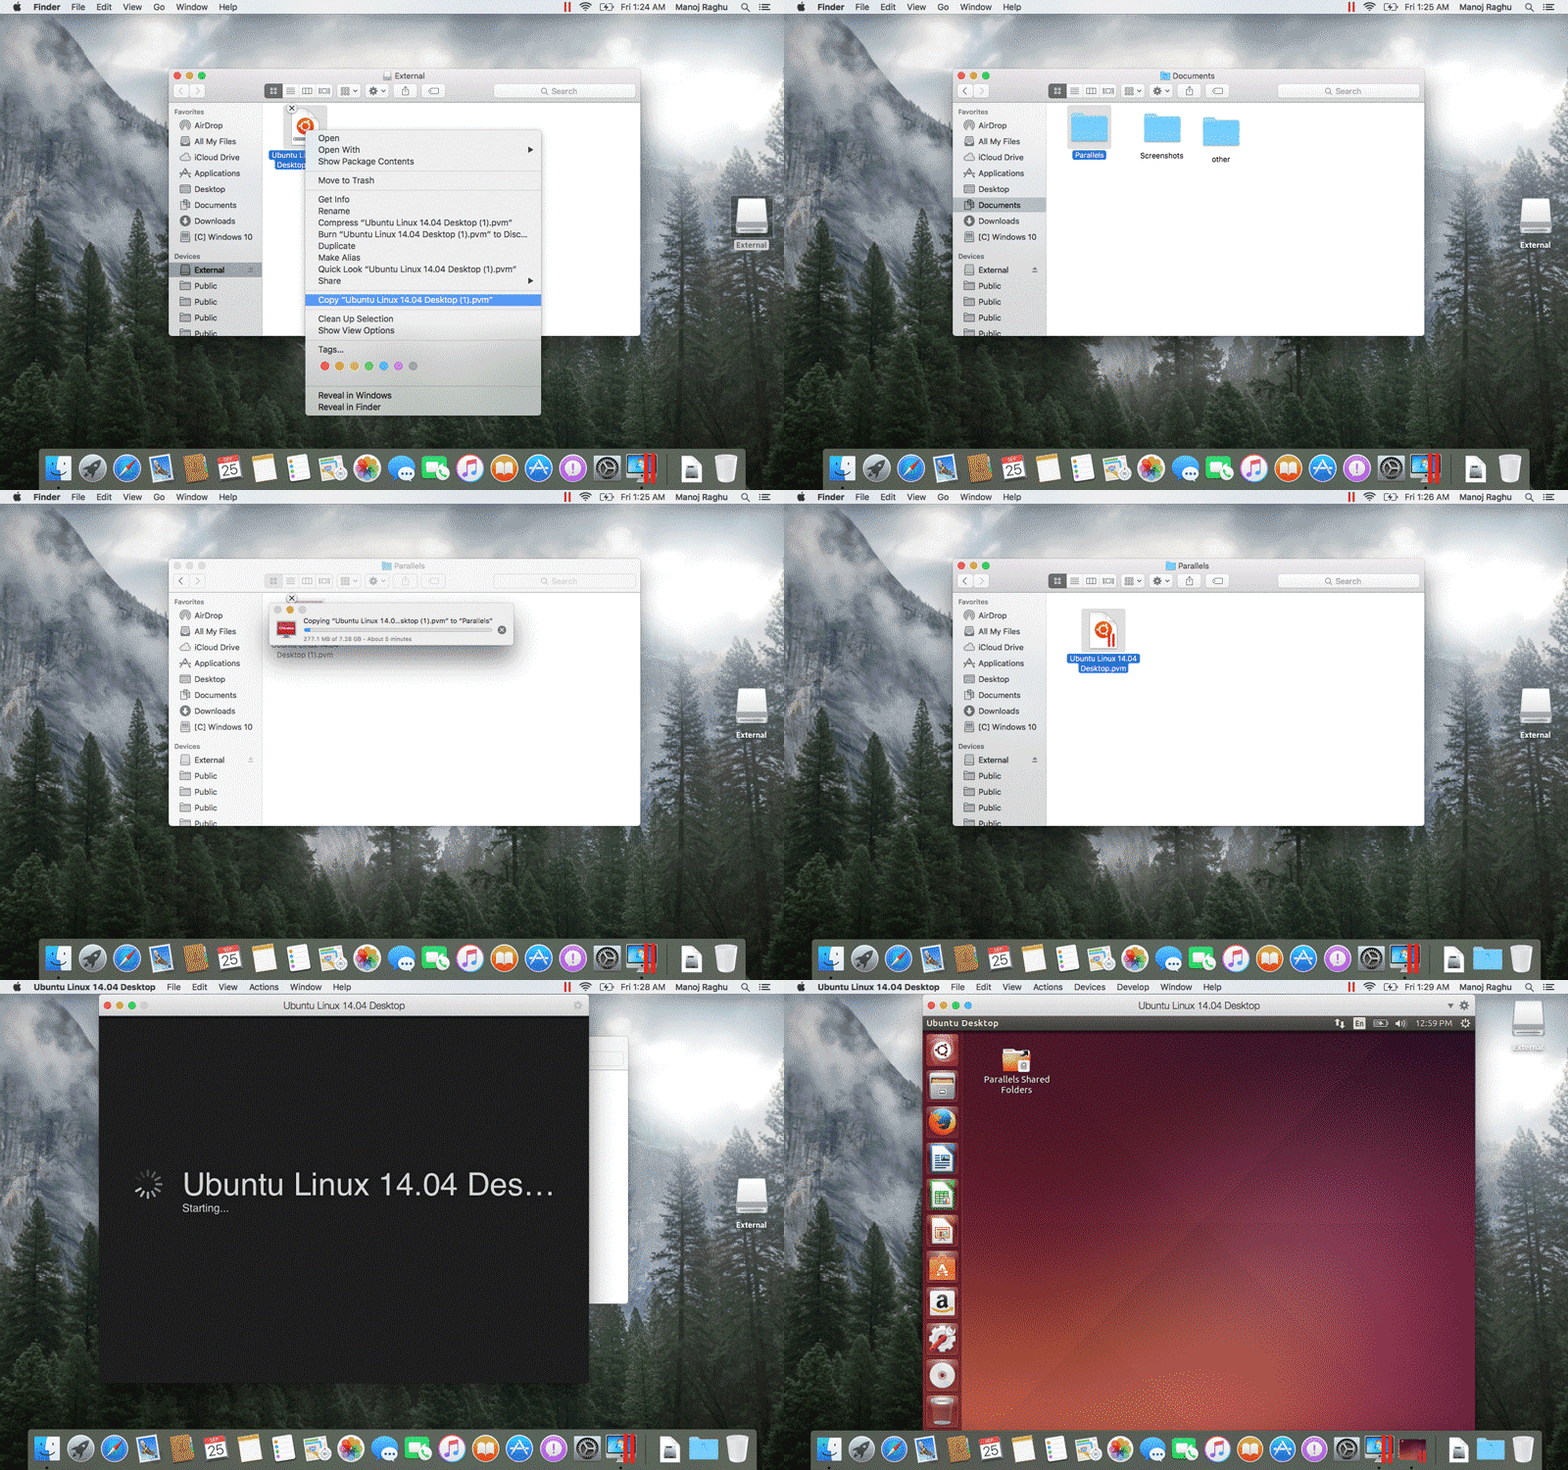
- Copy the .pvm file from the external hard drive to any folder on the destination Mac. I would recommend keeping it in your Documents → Parallels folder.
- Make sure Parallels Desktop is installed on your new Mac.
- Double-click on the .pvm file to start your VM, or right-click on it and choose Open with → Parallels Desktop.
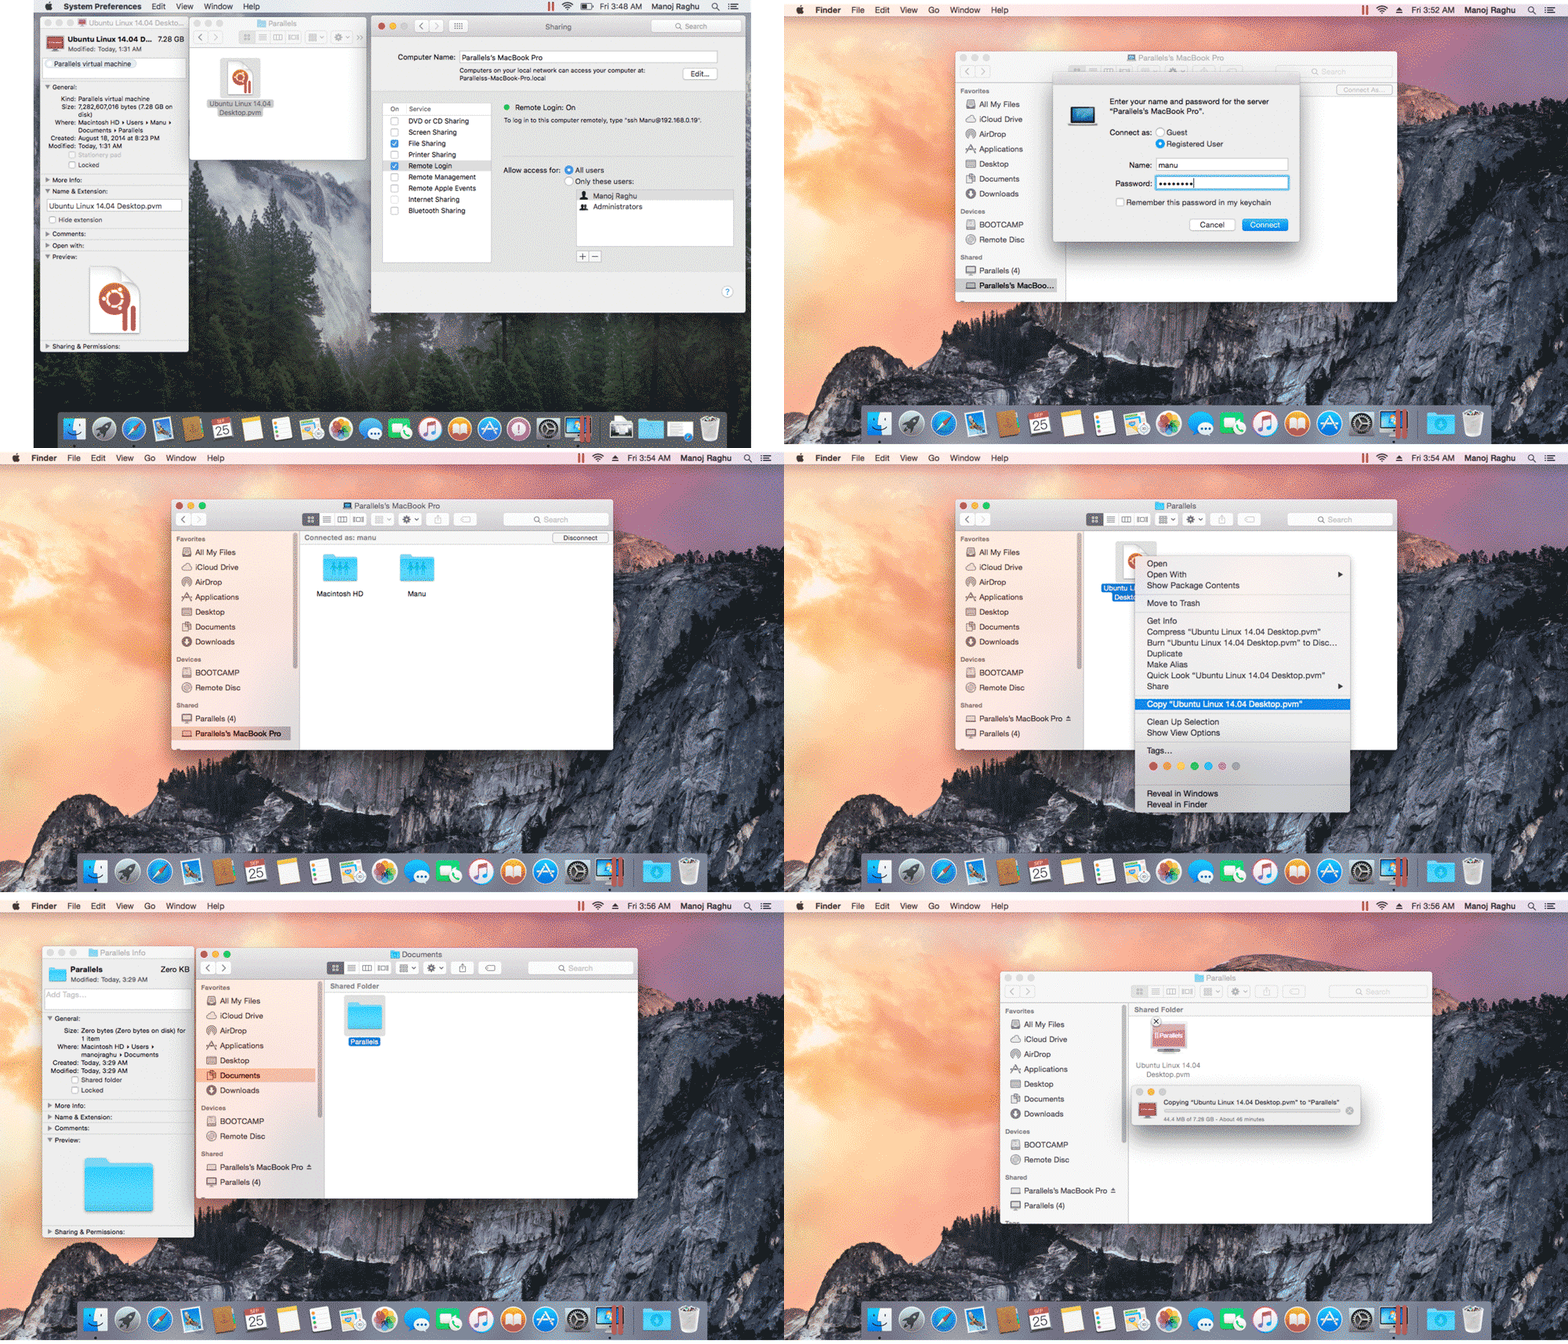
Don’t have an external drive? No problem, you can also transfer your VM via network. Here’s how.
How to Transfer Existing VM via Network
- On both of your Macs, go to System Preferences → Sharing and select File Sharing. Your Macs should be able to see each other on the local network.
- Configure the file transfer between your Macs as suggested in this article.
- Now open up Documents → Parallels folder on your old Mac.
- Copy your .pvm bundle.
- Now open the destination Mac’s Finder sidebar.
- Enter the guest Mac credentials and login into the user.
- Navigate to the Documents → Parallels folder inside your user folder.
- Paste the .pvm file from your host to the guest Mac.
Is your VM based on a Boot Camp partition? This adds only one more step to our process of moving it to a new Mac. Before following the instructions above, import your Boot Camp partition to the VM as suggested in this article.
We hope this blog helped you transfer your existing VM to your new Mac! Enjoy your brand new Mac, and don’t forget to follow the Support team on Twitter for tips, tricks, and help.
