This video is part of a Parallels Tech Byte series.
This video will demonstrate Parallels RAS and Microsoft Azure Virtual Desktop integration.
Azure Virtual Desktop, or AVD, is a service in Microsoft Azure that provides access to published applications and desktops.
Parallels RAS integrates with AVD and provides additional value, such as support for hybrid scenarios, extensive cost saving, ease of management, and enhanced user experience.
This video aims to show you how Parallels RAS can be used to deploy all aspects of AVD and create a production-ready environment quickly.
We start our journey in the Parallels RAS console.
As you can see, the console provides access to a wizard to help you deploy AVD.
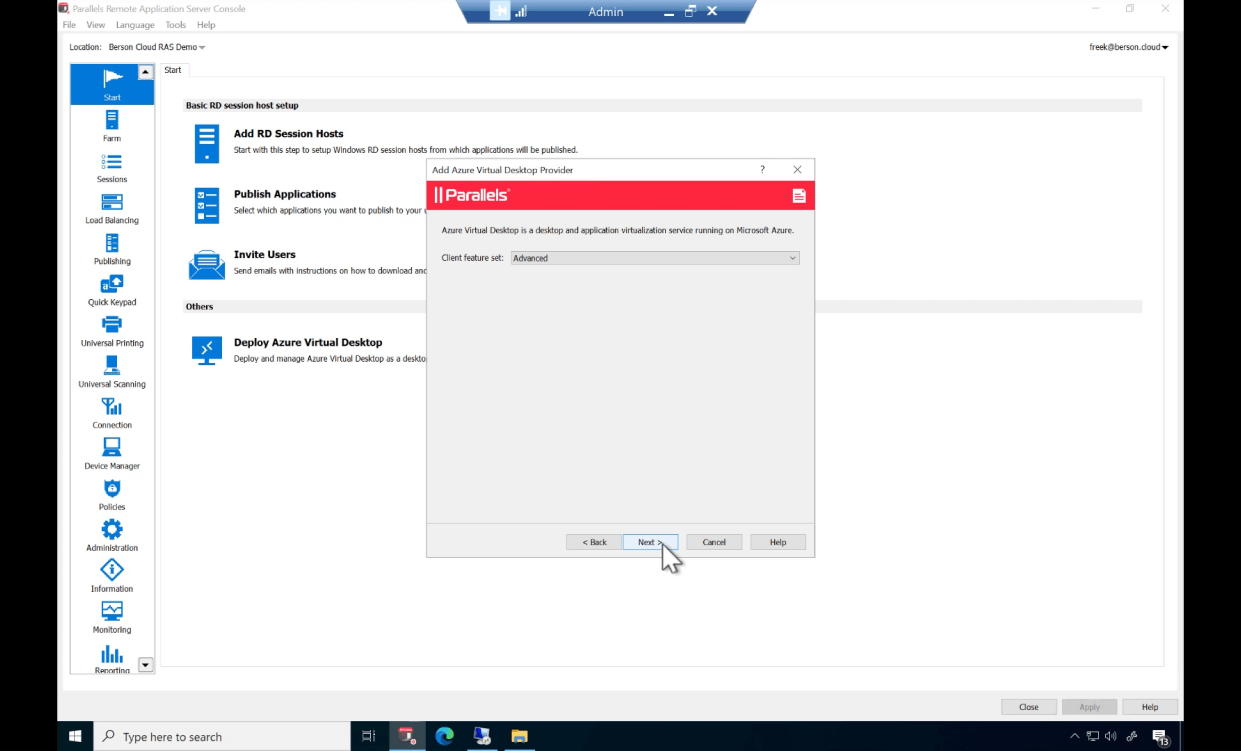
Go to Start and click on Deploy Azure Virtual Desktop.
First, select the client feature set.
When selecting Advanced, additional Parallels RAS features are added, such as universal printing scanning, URL redirection, drag and drop, and more.
The first step is to provide the information needed to make a secure connection to Azure.
The secure connection allows Parallel's RAS to create AVD resources in your Azure subscription.
Provide the Azure Tenant ID, Subscription ID, and application ID details.
Review our documentation for more information on the exact permissions required for this step.
Click Next to create the AVD provider.
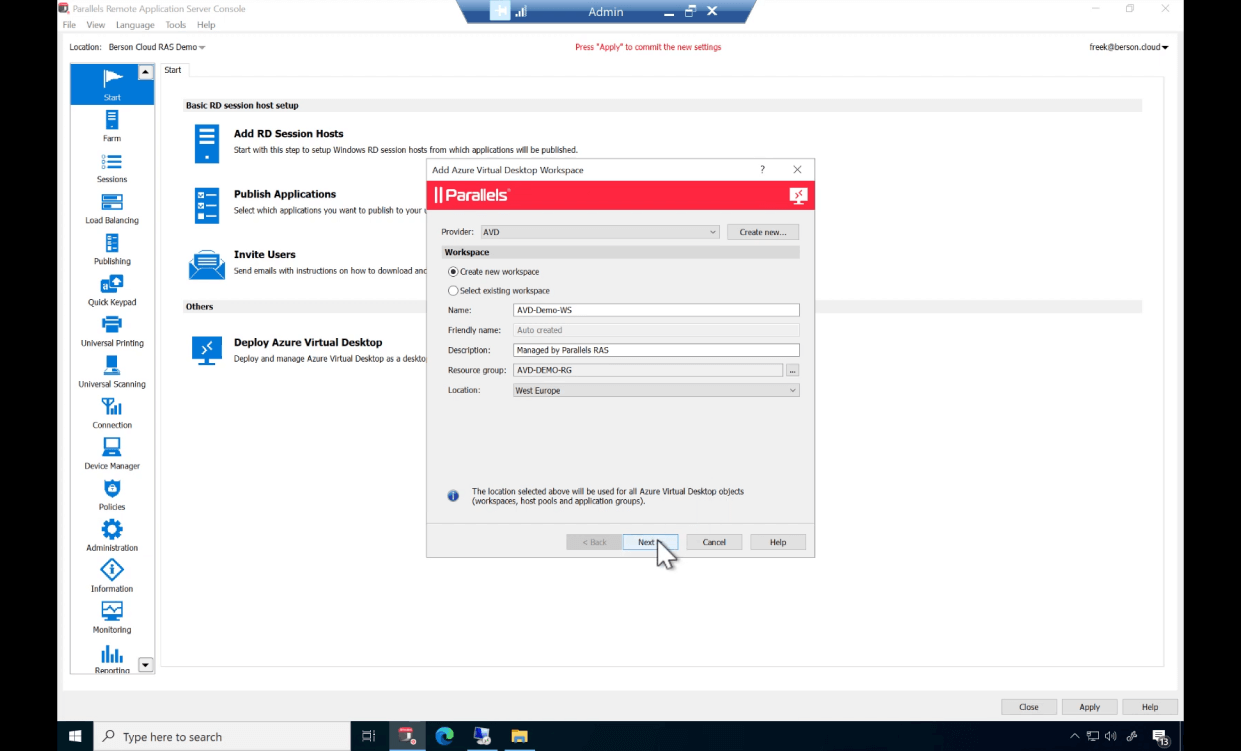
The wizard guides you to the next tab, creating the AVD workspace.
Provide a name, description, and resource group location to host the AVD workspace.
Click Next to continue.
Again, the wizard guides you to the next step: creating the AVD host pool.
Like before, provide a name, description, and resource group location where you want to deploy the AVD host pool.
Click Next to continue.
You now have the option to configure the host pool properties, such as the host pool type, which can be pulled for multi-sessions and personal for single
sessions, the publishing type, the low balancing method, and the option to limit the number of sessions.At any time, click the help button for more information on each option.
In this example, we'll set the publishing type to Desktop.
Click Next to continue.
Ideally, AVD session hosts are based on a template image to allow auto-scaling of the host pool.
There are two options available here.
Click on Custom Host to create a custom template image with your applications and settings.
As we'll do in this demo, select Azure Gallery to choose any available images that Microsoft Azure provides.
In this case, we'll use Windows 11 - Enterprise Multi-session, including Microsoft 365 apps for Enterprise.
Now, provide the local administrator account credentials.
Finally, select the desired Azure region to deploy the session host servers.
Click Next to continue.
The two screens provide more advanced options regarding Advanced settings and auto-scaling properties.
Change the template image naming conventions and auto-scaling properties as required.
For this demo, we'll accept the defaults.
The wizard now helps you to define more specifications on the session host servers, such as the VM size, the disk type, and the network location.
Change these settings accordingly and click Next.
Parallels RAS comes with over 140 different image optimizations, which increase user density and optimize Azure consumption costs.
Familiarize yourself with the impact of each option and make a selection here.
For this demo, we'll accept all image optimizations.
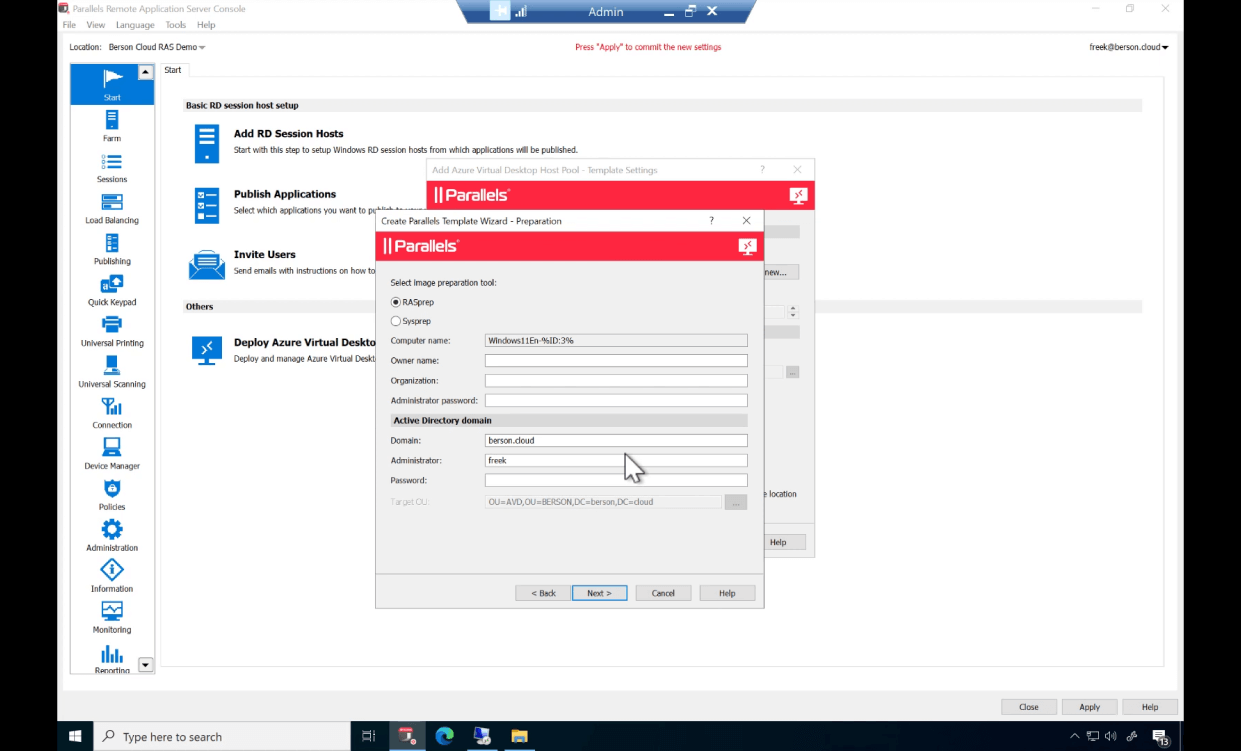
This is the last step in the image creation process.
Provide the details on how to prepare the image for duplication.
RASprep is our optimized way to generalize the image, but you can also use Sysprep instead.
Next, provide the credentials and details needed to add the session host servers to your domain.
Click Next and click Finish.
Now, provide details on the assignment. This allows configuring who has access to the AVD resources.
These settings can, of course, be modified later as well.
Once complete, click Next.
And this is the final step of this wizard.
It allows configuring profile management based on FSLogix profile containers.
Provide the location where you want to store the profile containers.
SMB and cloud cache are supported; you can even provide multiple locations to improve high availability.
To profile disk format, type, size, and more advanced settings can also be configured at this stage.
And that's it.
Based on the provided information, Parallel RAS has now started deploying the necessary resources in Azure, creating the template image, deploying the session
hosts, and configuring assignment and profile management.Click Finish and click Apply to commit the configuration.
To review the progress, go to Farm > Azure Virtual Desktop.
Note that the AVD workspace is created, the AVD host pool is created, and the template image is now in the creation Azure Portal process.
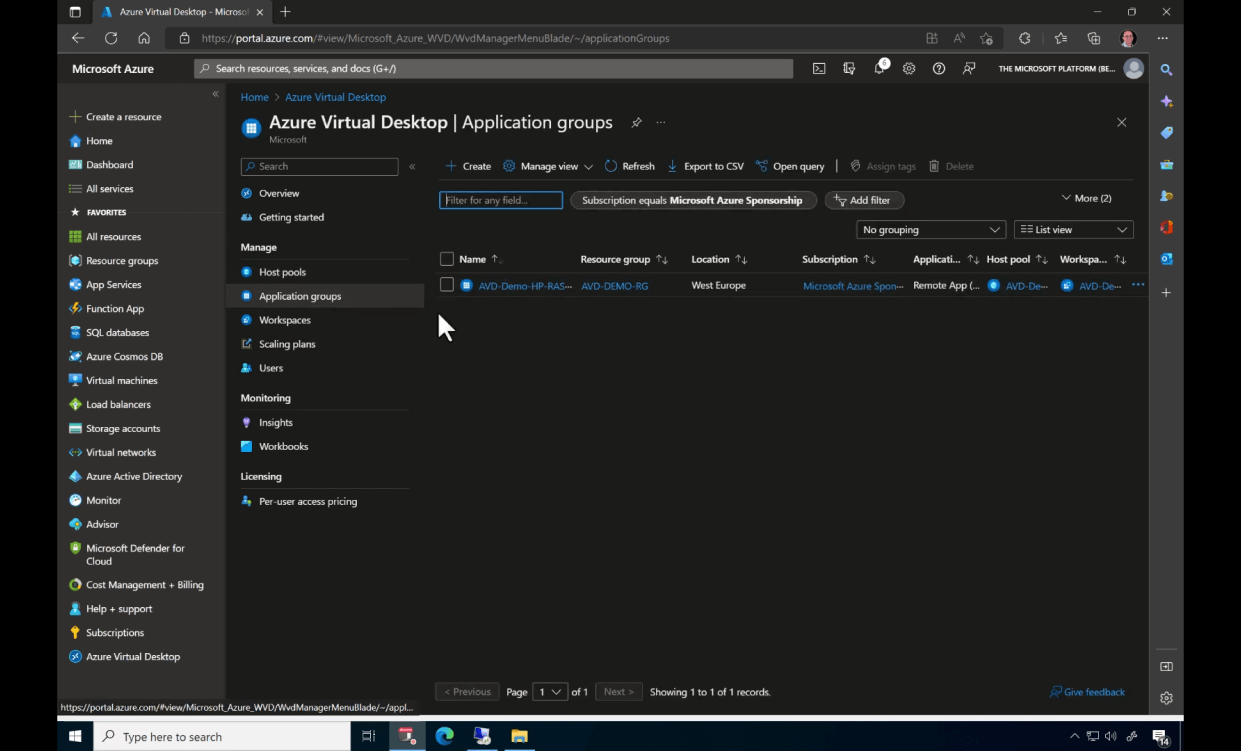
Switching to the Azure portal, note that the AVD host pool, application group, and workspace are also visible here.
Now, we are switching back to the Parallels RAS console.
For the sake of this demo, we have fast-forwarded the creation process of the template image.
The template now has the status ready, and the corresponding session host servers have been created.
Complete the published resources on the AVD environment.
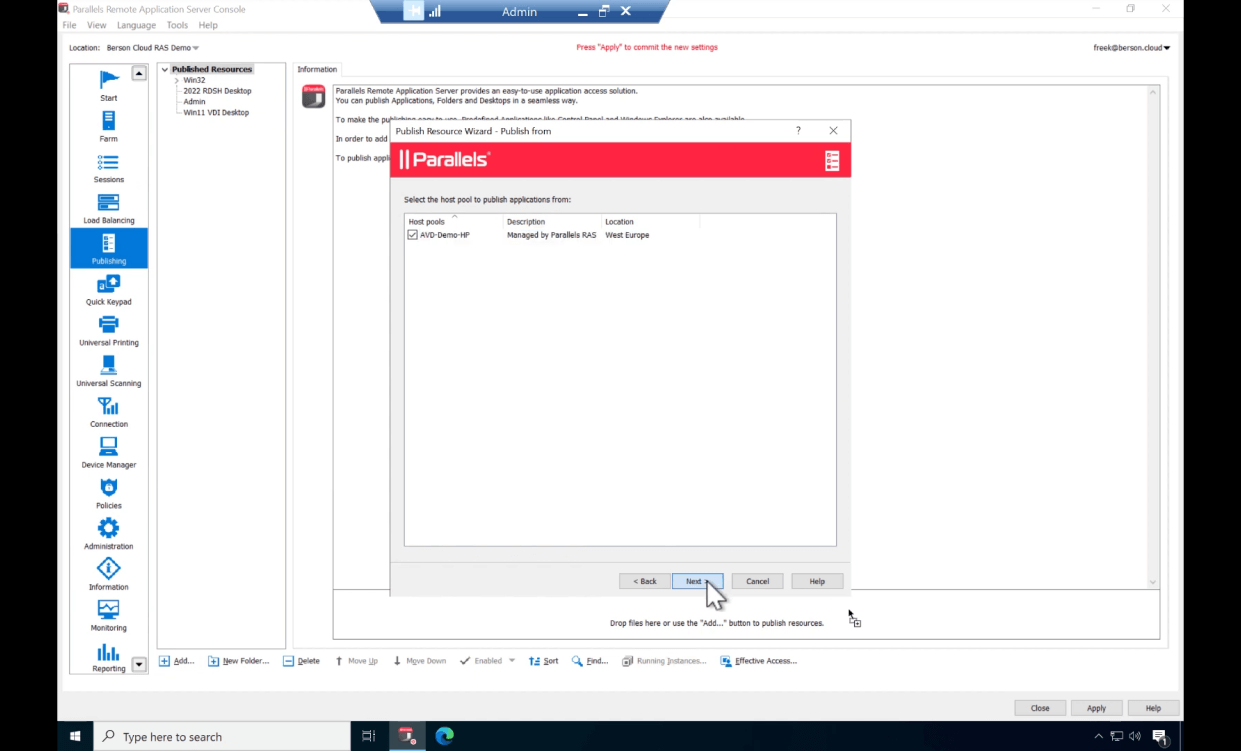
Open the publishing tab and click Add.
Select the type of resource you want to publish.
In this case, we select Desktop.
Click Next and select Azure Virtual Desktop as the provider.
Select the host pool you just created and click Next.
Now, provide the details of the published resource, which in this case is a desktop. As as a result, we can give a name, description, icon screen size, and multi-monitor settings.
The available options will vary here based on the type of resource you selected to publish.
Finally, provide details on the status of the published resource.
Select Enabled to make the published resource available instantly.
Click Apply to commit the configuration.
We are switching to the user to see the result.
In this case, we are using the Parallels RAS Windows client.
Create a new connection and provide the corporate email address.
Based on the email address, the Parallels RAS client is automatically configured.
Provide the password and any MFA that might be applied.
This particular user is authorized to access a couple of resources.
In this example, those come from a mix of RDSH, VDI, and AVD.
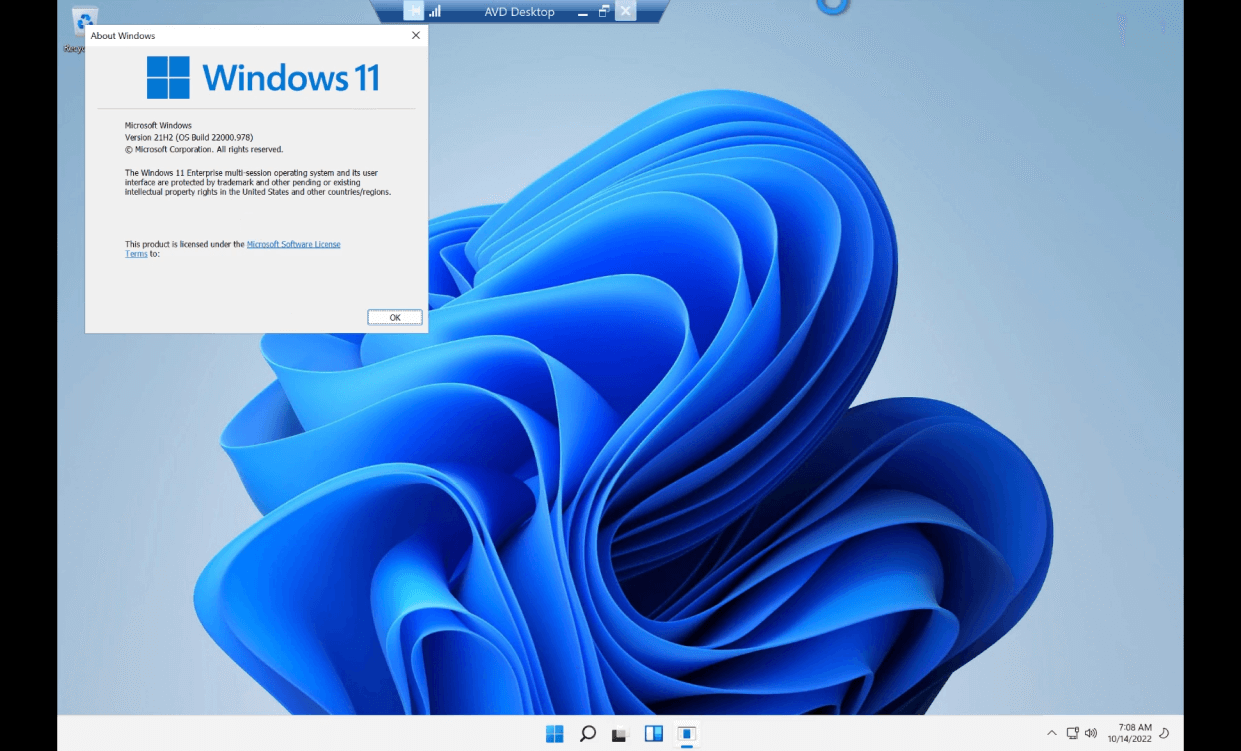
When clicking on the AVD desktop, the logout sequence starts, and we're presented with a Windows 11 multi-session desktop as part of Azure Virtual Desktop.
The Desktop is now ready for use.
The FSLogix agents indicated that the profile container is successfully mounted.
Disk Management confirms the mounted profile disk.
And finally, the About Windows dialog confirms we're using Windows 11 Enterprise Multi-session.
This concludes our video demonstrating Parallels RAS and Microsoft Azure Virtual Desktop integration.
For more content, subscribe to our channel and browse the Parallels Tech Byte series.